
 how-to
7 Steps to Evaluate Student Coding Projects Fairly
Last Updated: November 2, 2026
Quick Summary
To evaluate coding projects fairly, score the product and the process separately using one weighted rubric you reuse all year, then confirm understanding through code review, testing, and a short oral explanation. Write feedback that names one concrete next step, and give students a single-criterion revision window.
- State your criteria on day one in student-friendly language so students know the target.
- Keep rubrics to five to seven criteria and score process and product in separate columns.
- Test the program yourself with wrong or empty input and note whether students caught their own bugs.
- Limit feedback to three sentences and cap each revision cycle at one criterion.
- In team projects, score the product as a team and process and explanation individually.
Table of Contents
- Why Evaluating Student Coding Projects Is Harder Than Grading a Test
- Step 1: Set Evaluation Criteria Before Students Open an Editor
- Step 2: Build a Student Coding Project Rubric You Can Reuse
- Step 3: Review the Code for Correctness, Defects, and Quality
- Step 4: Test the Working Software and Read the Test Results
- Step 5: Use Coding Assessment Examples to Judge Understanding and Problem-Solving
- Step 6: Write Coding Project Feedback for Students That Changes Their Next Attempt
- Step 7: Pick Coding Assessment Tools That Fit Your Classroom
- Frequently Asked Questions
Why Evaluating Student Coding Projects Is Harder Than Grading a Test
A multiple-choice test has one right answer. A coding project has a hundred. Two students can build the same working game and learn completely different things along the way.
That is the core problem when you evaluate coding projects. You are not grading an answer. You are grading a process, a product, and a person's thinking, all at once.
The stakes are real. A global survey of more than 750 higher-education educators found a widespread shift toward oral exams, code reviews, debugging exercises, and project-based assessment as a way to check what students actually understand (ACM survey on assessing coding ability(EXTERNAL_LINK: ACM survey on assessing coding ability | acm.org)).
Here are seven steps you can run in any classroom.
Step 1: Set Evaluation Criteria Before Students Open an Editor
State your criteria on day one, in student-friendly language. Students who know the target hit it more often, and you grade faster when the standard is already public.
Write the criteria as a short list students can read:
- Does the program run without crashing?
- Does it solve the problem we set?
- Can the student explain how it works?
Post the list on the wall and refer to it during work time. Assessment becomes a shared goal instead of a surprise.
If you are new to teaching code, our guide on how to teach coding without experience walks through the same planning steps from the first lesson.
Matching Criteria to Project Scope and Complexity
For a short project, grade whether the core feature works. For a longer one, add points for planning, testing, and refinement. A student building an exploratory project with lots of trial and error should be judged on their debugging process, not just the final screen.
Set three levels per criterion: emerging, meeting, exceeding. That gives you room to reward a messy but honest attempt.
Step 2: Build a Student Coding Project Rubric You Can Reuse
A student coding project rubric names what you are judging, describes what each level of quality looks like, and converts those judgments into a defensible score. Most rubrics fail because they mix process and product into a single number, or carry so many criteria that nobody can hold them in mind. Build one weighted rubric, reuse it all year, and change only the scope line.
Separate Process From Product
The single most useful design decision is to score two things independently: the product (does the software work and is it maintainable?) and the process (did the student plan, test, debug, document, and reflect?). A student who struggled but improved deserves credit for growth; a student who coasted on easy code should not max out the product column. Keep the two columns separate on the page and report them separately.
A Reusable Weighted Rubric
Here is a rubric you can copy. The weights are a starting point, adjust them to your grade level and project length, but keep the total at 100 so the math stays transparent.
| Criterion | Type | Weight | Emerging (1) | Meeting (2) | Exceeding (3) |
|---|---|---|---|---|---|
| Correctness | Product | 25% | Program often fails or crashes | Runs with minor bugs | Runs cleanly on intended and edge inputs |
| Code quality & maintainability | Product | 15% | Messy, hard to read | Clear names, some structure | Organized, modular, easy for others to follow |
| Problem-solving | Process | 15% | Needs step-by-step help | Solves with some hints | Solves independently, tries alternatives |
| Testing & debugging | Process | 15% | No testing shown | Tests main features | Tests edge cases, finds and fixes issues |
| Planning & iteration | Process | 10% | No plan; one draft | Some planning; one revision | Clear plan; multiple documented revisions |
| Documentation & reflection | Process | 10% | No comments or reflection | Comments on tricky parts; short reflection | Clear docs; reflection explains choices and trade-offs |
| Explanation | Process | 10% | Cannot explain code | Explains main parts | Explains choices and trade-offs |
How to score it: For each criterion, assign 1, 2, or 3, multiply by the weight, then sum. A student who meets every criterion scores 2 × 100 = 200; divide by 2 to get a 100-point score.
Adapt the Rubric to Scope and Experience
Match the rubric to the build by adjusting the scope line at the top of the page, not the criteria:
- Short project (1-2 classes): Grade correctness and explanation only; mark process criteria as "not assessed."
- Medium project (1-2 weeks): Use the full rubric but weight correctness higher (30%) and planning lower (5%).
- Long or exploratory project: Weight process higher (testing, iteration, reflection) and judge debugging honestly, not just the final screen.
For students with prior experience, raise the bar on code quality and modularity; for beginners, weight correctness and explanation and treat style as feedback rather than a grade. If a student uses a block-based tool, translate the criteria, "modularity" becomes "uses custom blocks or functions instead of one long stack."
What a Strong Rubric Includes
A strong rubric names the skill, describes three observable levels, uses words students understand, and leaves space for comments. Keep it to five to seven criteria; longer rubrics get ignored and slow to grade. Share it on day one, refer to it during work time, and return it with the project so students see which row cost them points. Consistent application of these standards prepares students for the professional rigor required when evaluating developer portfolios.
For more on pairing assessment with instruction, see our teacher coding support resources.
Step 3: Review the Code for Correctness, Defects, and Quality
Read the code like an editor reads a draft. You are hunting for three things: does it work, what breaks it, and can another person follow it?
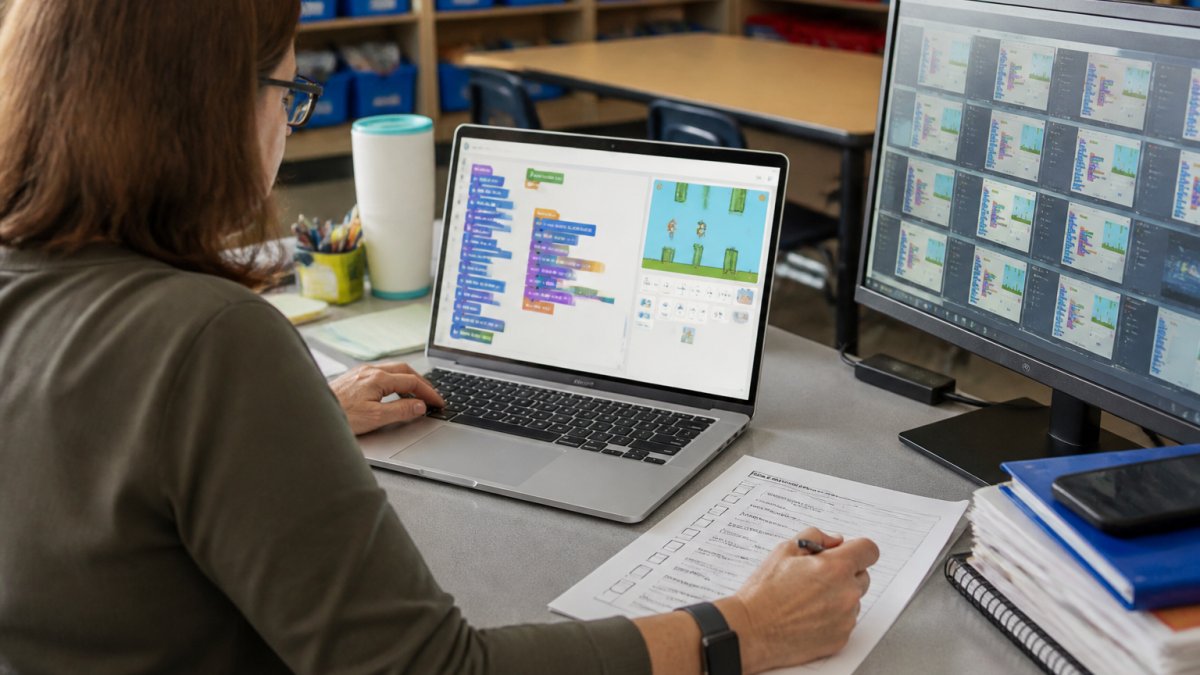
Use a short code-review checklist:
- Do variable and function names say what they do?
- Is the logic in a sensible order?
- Are there repeated blocks that could be a loop?
You do not need to be a programmer to spot most of this. Research on code-quality improvement metrics shows that tracking how code gets better over time is a workable way to judge individual contribution, not just the final file (Journal of Systems and Software study on code-quality metrics(EXTERNAL_LINK: Journal of Systems and Software study on code-quality metrics | sciencedirect.com)).
Watch out: grading style as heavily as function punishes beginners who are still learning structure. Weight correctness first, quality second.
Step 4: Test the Working Software and Read the Test Results
Working software is the real test. Run the program yourself and try to break it.
Test in this order:
- Run it the way the student intended.
- Enter wrong or empty input.
- Click everything twice.
- Ask a classmate to try it cold.
Unit tests help older students prove their own work. A systematic review of code-structure evaluation found that function-level topics are treated as essential when judging code (ACM review of code evaluation approaches(EXTERNAL_LINK: ACM review of code evaluation approaches | acm.org)).
When a test fails, note whether the student found it first. Self-caught bugs are a sign of strong analytical skills.
Step 5: Use Coding Assessment Examples to Judge Understanding and Problem-Solving
Ask the student to explain the code out loud. Understanding lives in the explanation, not the output.
Try these coding assessment examples:
- "Show me the part you are proudest of and tell me why."
- "What would break if we changed this number?"
- "Walk me through one bug you fixed."
When you evaluate coding projects, a student who can trace their own logic is learning. A student who shrugs has a working program but no grip on the concepts behind it.
Large language models are now being used to auto-evaluate student project reports, which shows how much weight written reflection carries in modern assessment (ScienceDirect study on LLM feedback evaluation(EXTERNAL_LINK: ScienceDirect study on LLM feedback evaluation | sciencedirect.com)).
Step 6: Write Coding Project Feedback for Students That Changes Their Next Attempt
Good coding project feedback for students points at the next move, not the last mistake. "Nice work" changes nothing. "Your loop works. Next time, name your variables so a friend can read them" changes the next attempt.
A Three-Part Feedback Template
Use this structure for every project, and keep it to three sentences:
What worked: [specific thing they did well] What to try next: [one concrete change] Question for you: [one prompt to check understanding]
One fix at a time actually lands. Ten comments get skimmed and forgotten. If you can only write one sentence, write the "what to try next" sentence, it is the one that changes the next attempt.
Turn Feedback Into a Revision Loop
Feedback only changes learning if students act on it. Build a short revision cycle into the project:
- Return the rubric with the feedback. Circle the one row the student should improve.
- Give a fixed revision window, one class period or one homework slot, for a single targeted change.
- Ask for a two-line revision note: what they changed and why. This is your evidence of process, and it doubles as reflection.
- Re-score only the circled row. Do not re-grade the whole project; that punishes students for revising.
Cap the revision at one criterion per cycle. It keeps your grading load predictable and teaches students that improvement is incremental, not a rewrite.
Calibrate Across Graders
If more than one teacher, aide, or teaching assistant grades projects, calibrate first with a norming session: everyone independently scores the same two or three anonymized projects against the rubric, then the group compares scores row by row and argues out the disagreements. Most drift shows up in the process criteria, testing, iteration, reflection, because they are less visible than a crashing program. Write down the agreed interpretation for each disputed row and keep it with the rubric. Repeat each term.
Handle Team Projects Fairly
Group projects make feedback harder because you are grading both a shared product and individual learning. Separate the two:
- Score the product once, as a team. Correctness and code quality belong to the group.
- Score process and explanation individually. Use short oral checks ("walk me through the part you wrote") and individual reflection notes.
- Ask for a contribution map. Each team member writes one sentence per teammate describing what that person built. Discrepancies are your signal to investigate, not to punish.
Keep Feedback Motivational
Feedback also lifts motivation. Students who see a clear path forward try harder on the revision, and that revision is where the real learning happens. Name the specific behavior you want to see again, not the student's talent, "you tested the empty-input case before I did" is repeatable; "you're a natural coder" is not.
Close the loop publicly. Share one anonymized "what worked / what to try next" pair with the class each week. It normalizes revision and saves you from repeating the same comment on twenty projects.
Step 7: Pick Coding Assessment Tools That Fit Your Classroom
Choose tools that show you student work, track progress, and fit your budget and devices. The right coding assessment tools cut grading time and give you evidence for report cards and administrators.
Look for these features:
- A teacher dashboard showing each student's progress
- Built-in projects you can assess against your rubric
- Support for web, tablet, and phone so every student can participate
Before you commit, compare licenses and dashboards with our educational coding software license review. If you want game-based practice that fits K-8 assessment, our guide to a code academy game for K-8 classrooms shows what to look for. For the bigger rollout picture, read how to implement technology in K-8 classrooms.
CodeAlgo Academy is built for exactly this.
As middle school teacher @mspears_teaches put it: "CodeAlgo came to our middle school and made a tremendous impact on our future computer scientists."
Frequently Asked Questions
How do you assess a student coding project without being a coding expert?
You do not need to read every line of code to evaluate coding projects well. Start with what the program does: run it, try to break it, and check whether it solves the assigned problem. Use a written student coding project rubric so your judgment rests on visible criteria like correctness, testing, and iteration rather than on syntax you may not know. Platforms such as CodeAlgo Academy also give teachers built-in progress data, so the assessment evidence arrives before you open a single file.
Should students be graded on their code or the final product?
Grade both, but separately. The final product shows whether the working software meets the brief; the code shows whether the student understands programming concepts and can keep the project maintainable. A process score covering planning, debugging, and iteration prevents a lucky finished app from hiding weak understanding, and it stops a messy but thoughtful attempt from scoring zero. Split the rubric into product and process columns and weight them to match your learning outcomes.
What should a coding project rubric include?
A usable rubric covers six areas: correctness against the requirements, code quality and readability, testing and debugging evidence, problem-solving and analytical skills, project scope matched to experience level, and collaboration or individual contribution. Add short descriptors for each level so two teachers grading the same project reach similar scores. Keep it to one page. Longer rubrics get ignored, and students cannot act on feedback they cannot parse.
How do you grade coding projects fairly across different project types?
Score against the criteria you set for that project, not against the most impressive project in the class. An exploratory project and a research project should share the same core rubric for process and code quality, with the product criteria rewritten for each type. For group work, use code review history and commit records to separate individual contribution from team output. That way a student who wrote less code but tested and refined it thoroughly is not penalized for choosing a smaller scope.
Evaluating student coding projects fairly takes a rubric, a checklist, and a habit of asking students to explain their work. That is a lot to build alone. CodeAlgo Academy gives you standards-aligned curriculum, adaptive learning paths, and a teacher dashboard that shows real progress, all without a coding background. Get started with CodeAlgo Academy and turn project assessment into the most useful part of your week.